![EatClub Plate Logo-10.png]](https://sales.eatclub.com.au/hs-fs/hubfs/EatClub%20Plate%20Logo-10.png?height=50&name=EatClub%20Plate%20Logo-10.png)
1. Navigate to Help Desk & Verify Default Views
Focus: Confirm your left sidebar displays the two core working views.
- Navigate to the Help Desk icon in the left sidebar.
- Verify the following views are pinned and visible:
- Hello @ Inbox — displays New tickets only.
- Hello emails in progress — displays In Progress tickets only.
- If either view is missing, ask your manager to share the view or clone it from the shared folder.
Outcome: You can see both views in your left sidebar, ready to work.
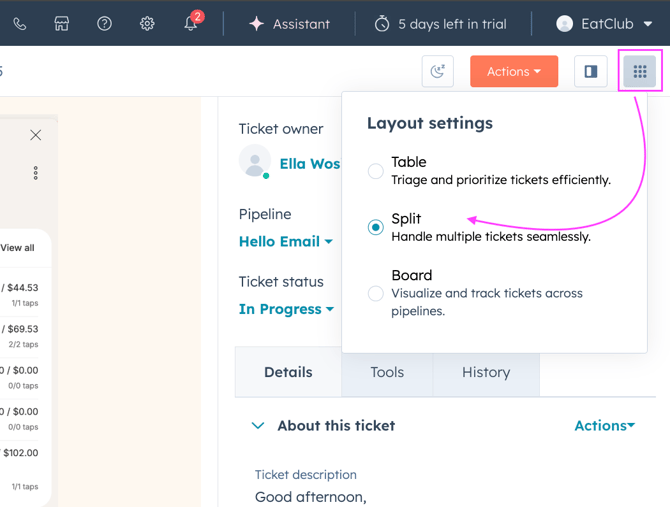
2. Change Your Layout to "Split View"
Focus: Handle multiple tickets without losing context.
- In the top-right corner of the Help Desk, locate the Layout settings button (grid icon).
- Select Split (the middle option).
- Table = single-ticket view (not recommended).
- Split = ticket list (left) + ticket detail (right) side-by-side.
- Confirm your screen now shows the ticket list on the left and the conversation/details on the right.
Outcome: Your workspace is now in Split view; you can scan the queue and open tickets without losing your place.
3. Set Your Default View to "Hello @ Inbox"
Focus: This is your primary starting point for every shift.
- Click Hello @ Inbox in the left sidebar.
- This view is your primary triage queue where all unassigned and new incoming mail arrives.
Outcome: Your default working view is set to the incoming "New" queue.
4. Sort Your Queue: Oldest First
Focus: Ensure you are always addressing the longest-waiting customer first.
- In the Hello @ Inbox view, look for the sort icon (three horizontal lines with arrows) in the ticket list header.
- Select Oldest first (oldest timestamp at the top).
- Note: You must also apply this sorting to the Hello emails in progress view.
Outcome: Your queue is prioritized by age; the oldest unresolved tickets remain at the top of your list.
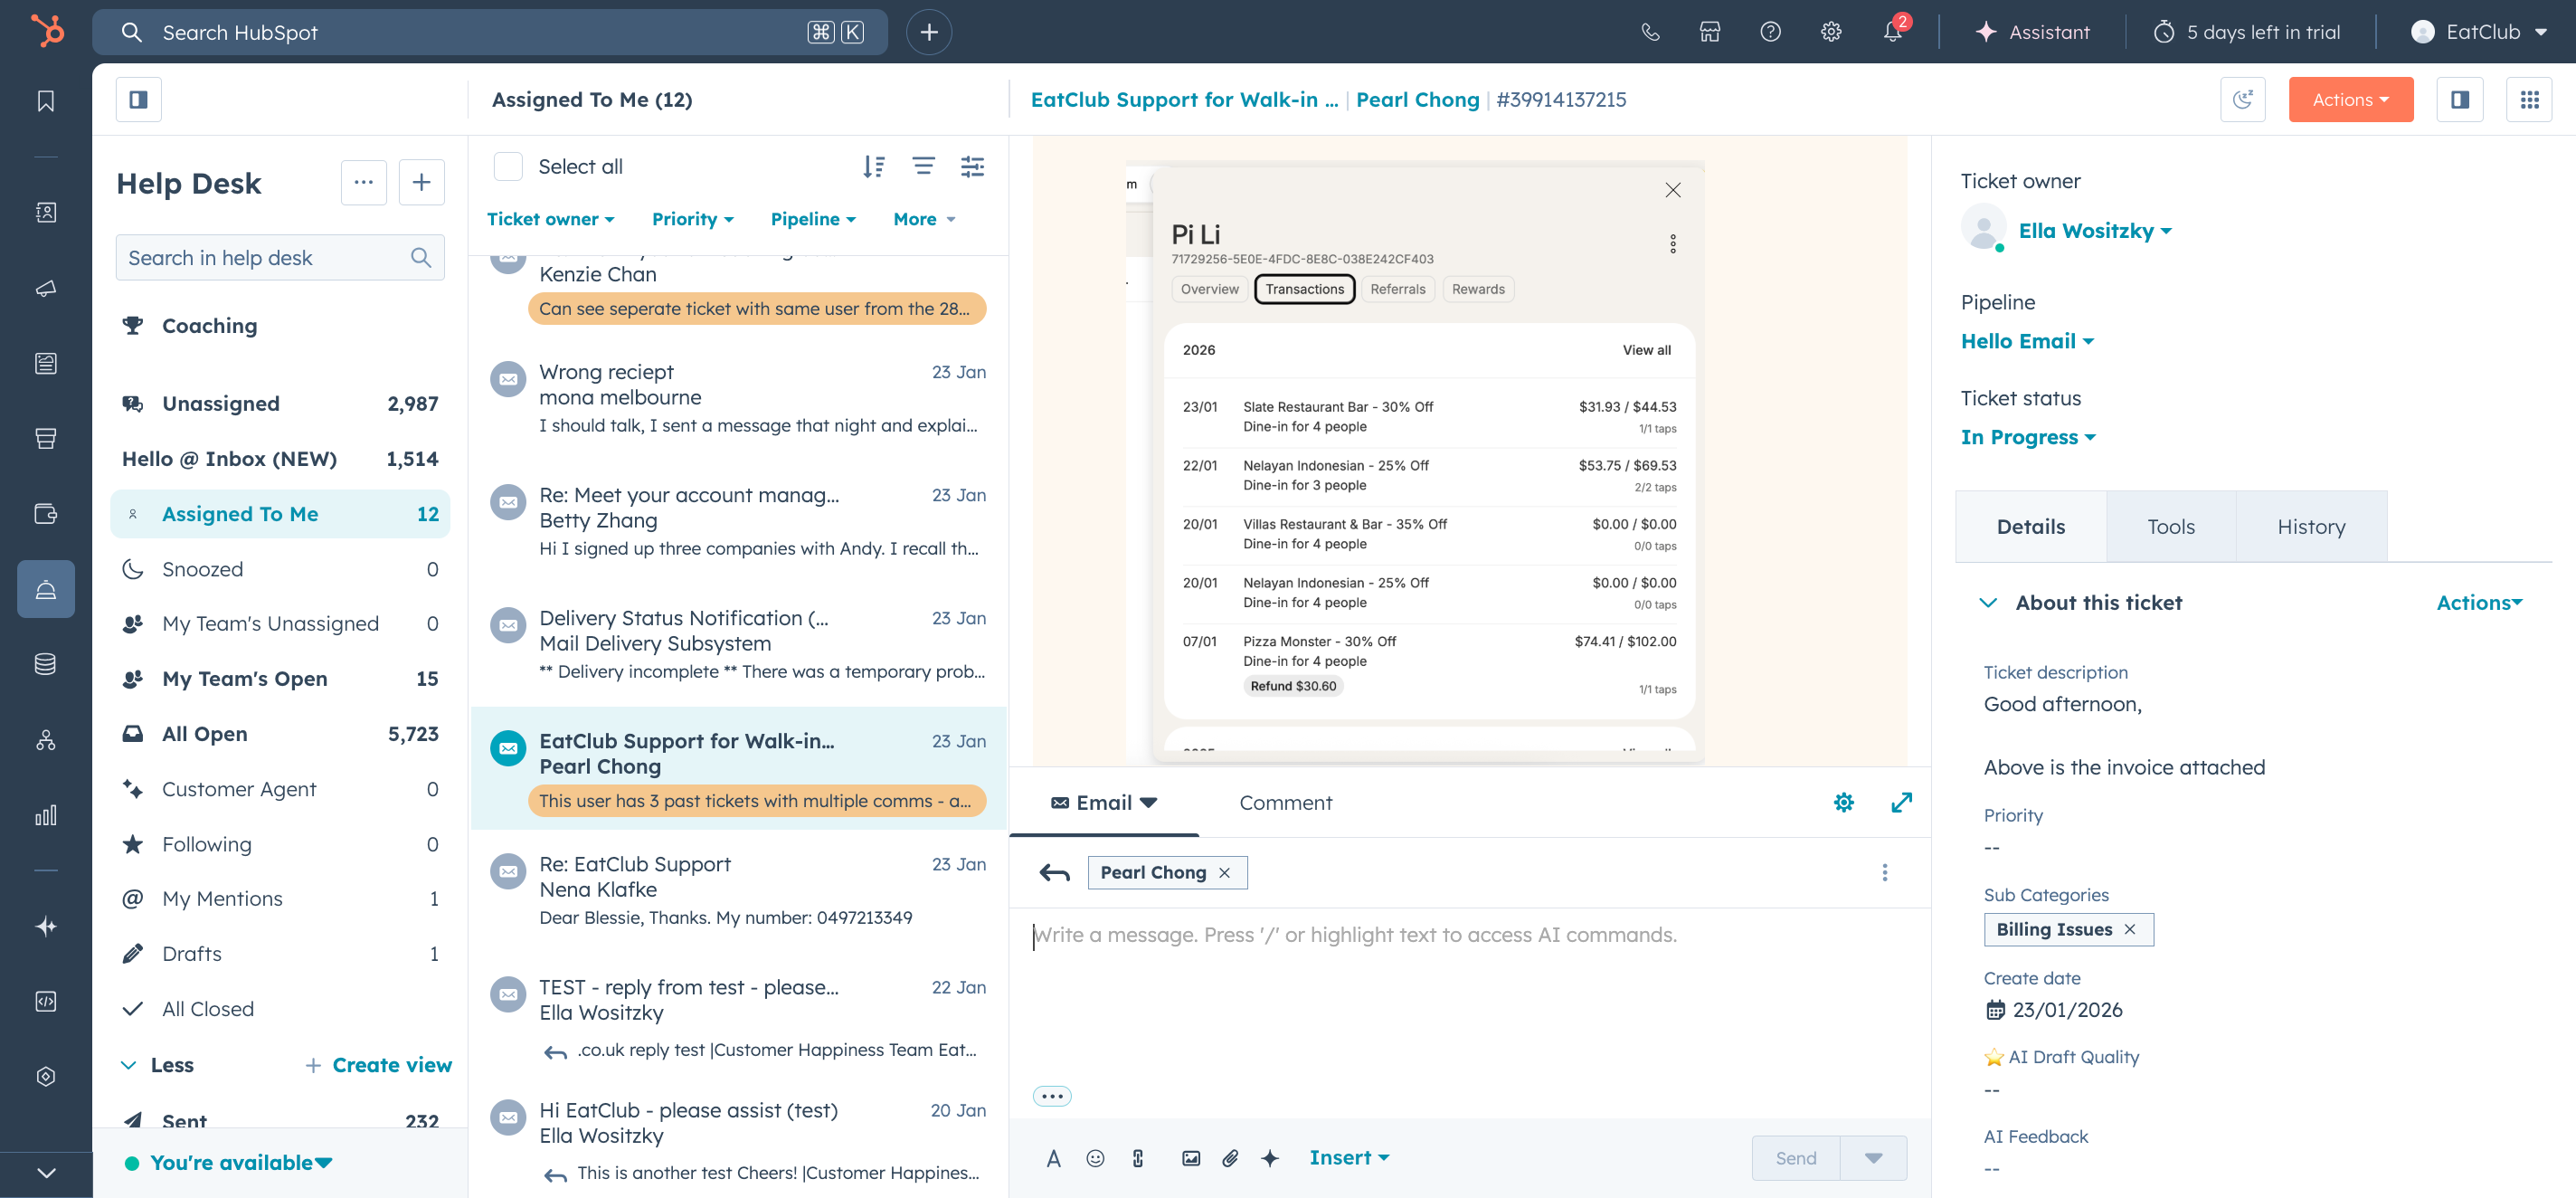
5. Verify Right-Rail Visibility (Details Tab)
Focus: Ensure key ticket fields are visible for fast triage.
- In the right panel, confirm the Details tab is selected (default).
- You should see:
- Ticket owner (assign here or leave as "No owner").
- Pipeline (should show Hello Email).
- Ticket status (New / In Progress / Waiting on customer / Closed).
- About this ticket section (ticket description, contact info).
Outcome: All critical ticket metadata is visible; you can triage without opening the full ticket.
6. Views (Hello @ Inbox → Hello emails in progress)
Focus: Understand the automated movement of tickets.
- Automatic Routing: You do not manually move tickets between these folders.
- When you change a ticket's Status from New to In Progress, HubSpot automatically removes it from the Hello @ Inbox view and places it into the Hello emails in progress view.
- Monitoring: It is important to monitor and keep track of In Progress tickets to ensure resolution and ensure tickets are not left.
Outcome: Your "Inbox" stays clear for new arrivals while your "In Progress" folder tracks your active workload.
Key Principles / Things to Note
- Split View is Standard: Always use Split view for email support. Table view is too slow for high-volume triage.
- Oldest First, Always: Backlog prioritization prevents customer frustration. Never cherry-pick new tickets.
- Pipeline Lock: The Hello Email pipeline is fixed for this workspace. Do not change it.
- View Consistency: Ensure both your "Inbox" and "In Progress" views are sorted by Oldest First to maintain a consistent workflow.